How to replace Netflix and Google Photos with your own home server, part 1
Inspired by a conversation on Mastodon, I thought it might be fun to try to write up the process of turning a spare PC into your own home server, assuming absolutely zero prior knowledge of administering Linux servers. Part 1 will cover installing the OS, Part 2 will cover basic terminal familiarity and Part 3 will cover installing and configuring your services. I’ll be glossing over a lot of things that are outside the scope of the tutorial, but I’ll mention them in passing in case the reader wants to dive down whichever rabbit hole they represent.
Let’s assume you have your new server set up with a keyboard, mouse and monitor. You’ll only need the latter two for initial setup, as this machine is going to be running headless – you’ll access it over the network. Let’s also assume for the sake of argument that you have another desktop or laptop PC running Windows (because statistically it is) that you use day to day.
The first thing you’re going to need is the operating system you’re going to run your new server on. I’ve picked Ubuntu Server for this, as it’s a very common server-focused OS. You’re going to need to grab the ISO image (the LTS version is recommended as it’s supported for 5 years) and prepare a bootable USB drive using your favourite tool (Rufus, Balena Etcher etc).
Install Ubuntu Server following this guide. Most of the time you can just accept the defaults, but on Step 7 (Networking) we’re going to need to take a detour to your router’s admin page. Most devices like desktops, laptops, phones etc will use DHCP, where the router hands out the next available IP address from a range it maintains for that purpose. A server is a little different in that it needs to always be found at the same place, so we’re going to configure a static IP.
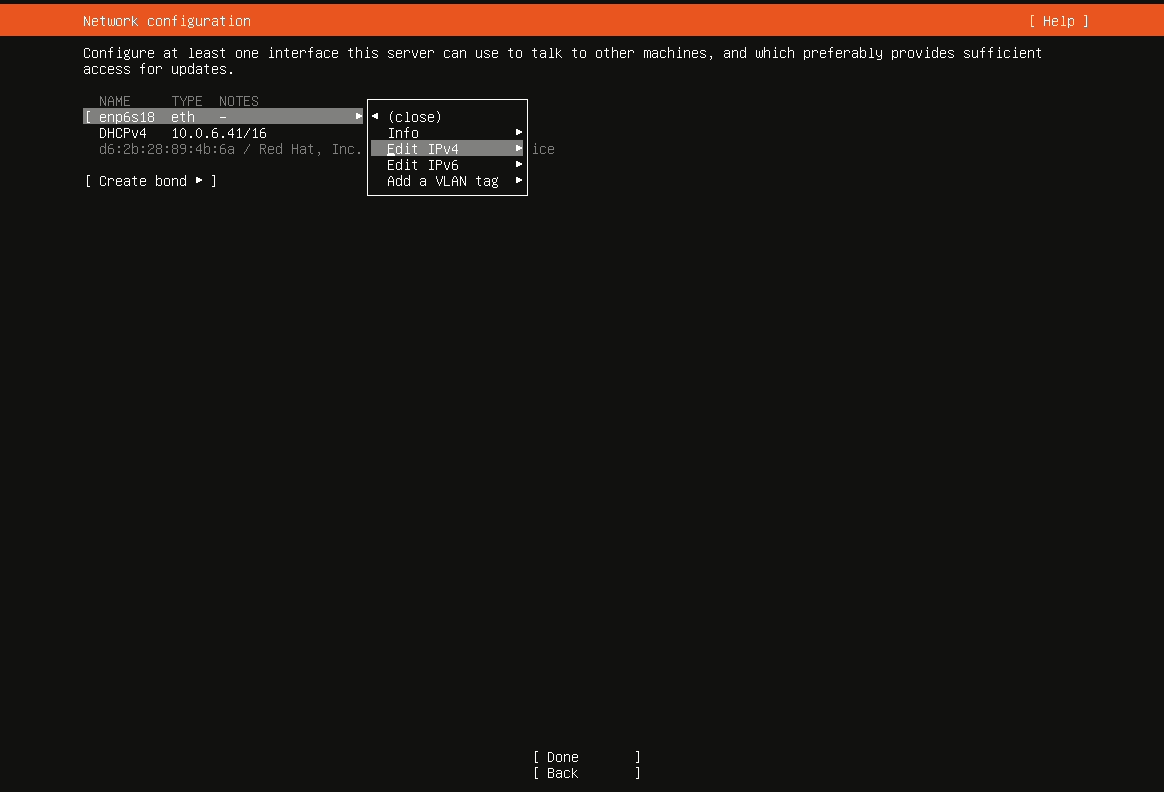
You can find out some basics about your network on Windows by running the ipconfig command in a command prompt.
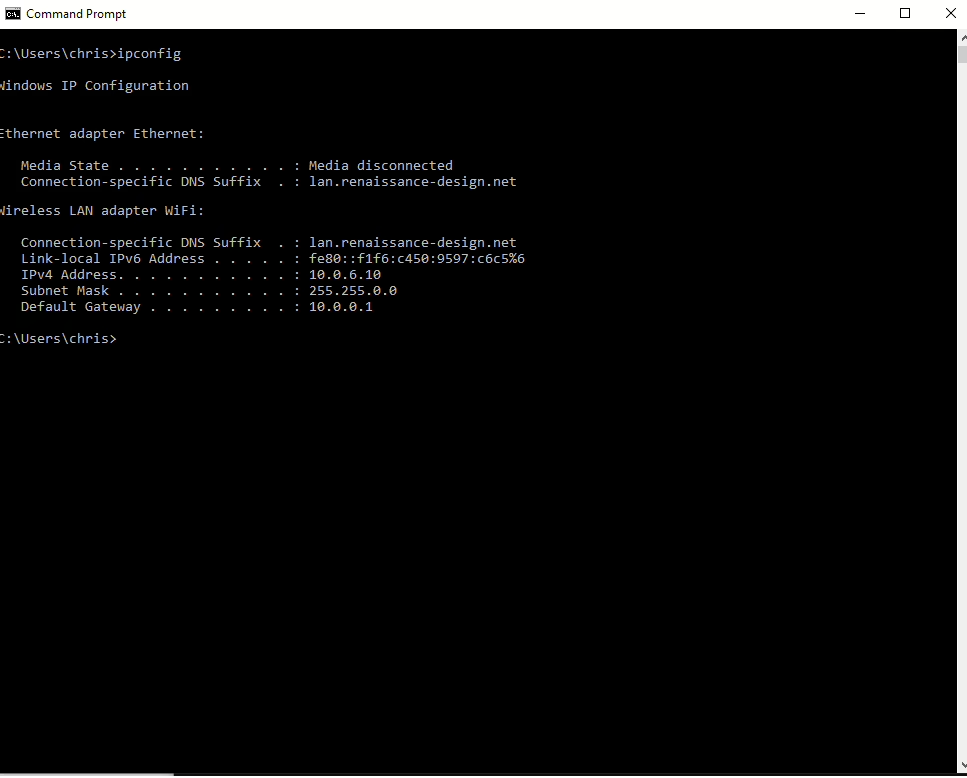
If you’re using a regular consumer router you’ll likely see that its IP address (labelled “Default Gateway”) is either 192.168.0.1 or 192.168.1.1 and your subnet mask is 255.255.255.0 – the subnet mask is responsible for defining how much of the IP address belongs to your local network. 255.255.255.0 means your local network consists of just the IP addresses after the last dot, ie 192.168.0.1 – 192.168.0.255 or 192.168.1.1 – 192.168.1.255. Your router will reserve part of that 1-255 range for DHCP. You’ll need to go through your router’s settings and find an IP address you can set that’s within the range that the router administers so it’s still part of your local network, but outside of the range it reserves for DHCP so it won’t accidentally hand out the same IP address to your phone, your laptop or your smart TV and cause a conflict. Exactly where to go to get this info is going to depend on your particular model of router.
Here’s where we hit a small snag: the Ubuntu installer will want you to enter the subnet mask in CIDR format. We’re not going to go into the weeds about CIDR because that’s a whole tutorial in itself. All you should need to know for the purposes of this tutorial is if your router’s IP is 192.168.1.1 and your subnet mask is 255.255.255.0, your subnet mask in CIDR format is 192.168.1.0/24, as shown below:
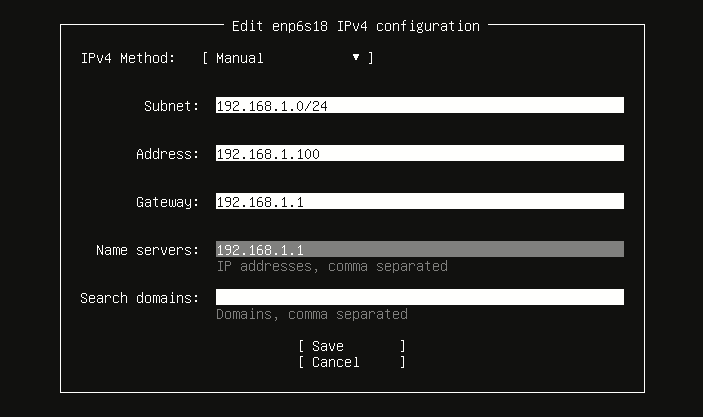
A 255.255.255.0 subnet translates to /24 in CIDR, and the rest of the subnet field is the multicast address for the network. Again outside of the scope of the tutorial, all you need to know is it’s in the same range as the IP of the router but ends in .0
Next up is the storage configuration screen. For whatever reason “use entire disk” doesn’t actually use the entire disk as you’d expect, so it’s best to expand the logical volume at this point so we don’t have to worry about it later.
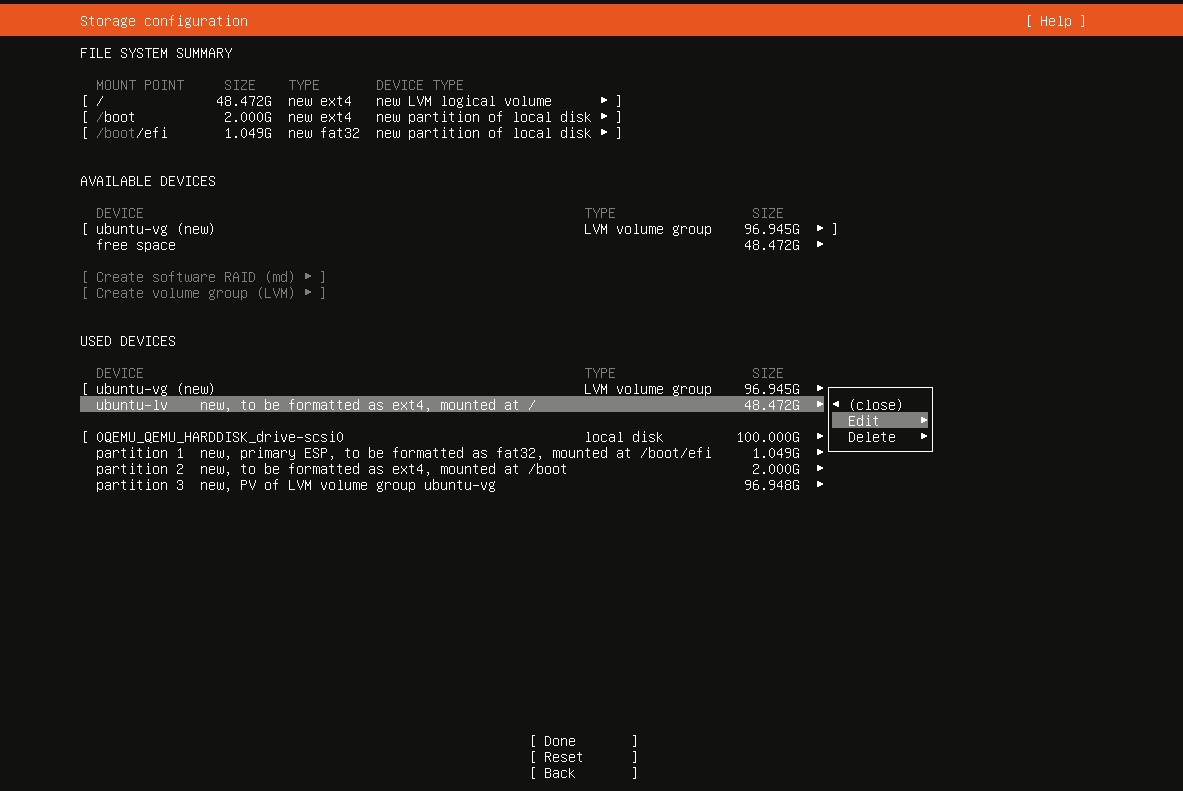
Edit the size field to match the max value, save and continue. Next we’ll create a user and name the server:
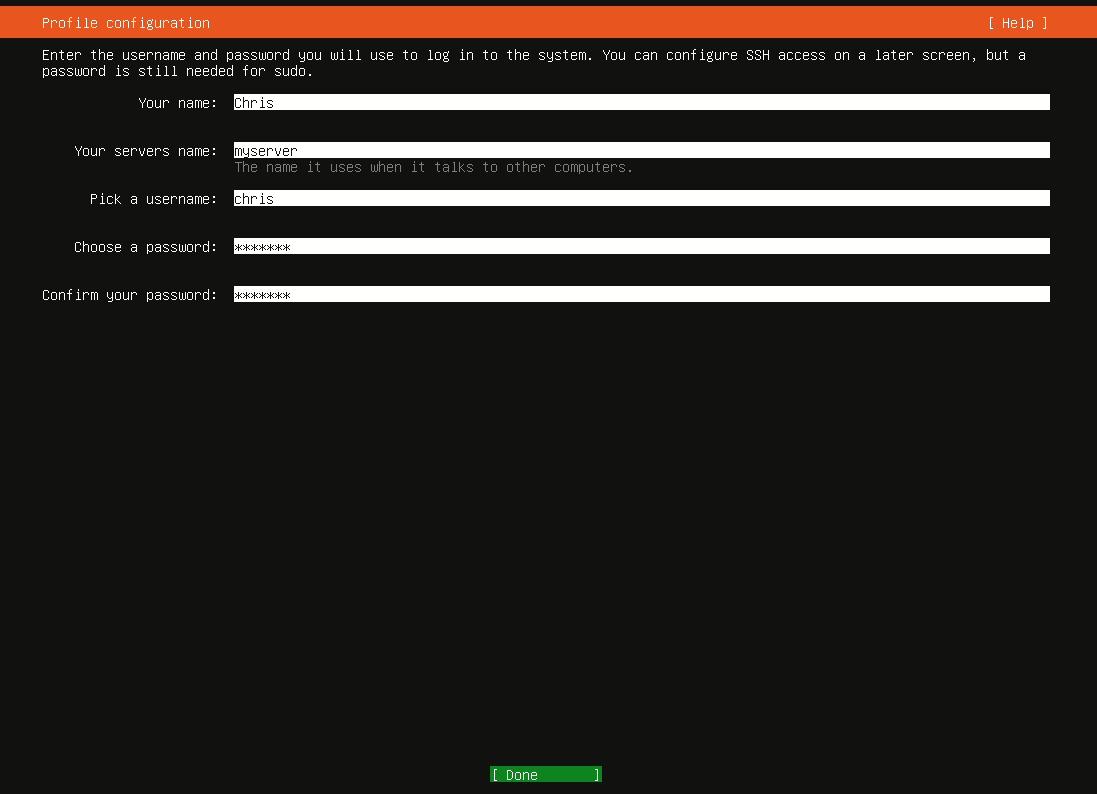
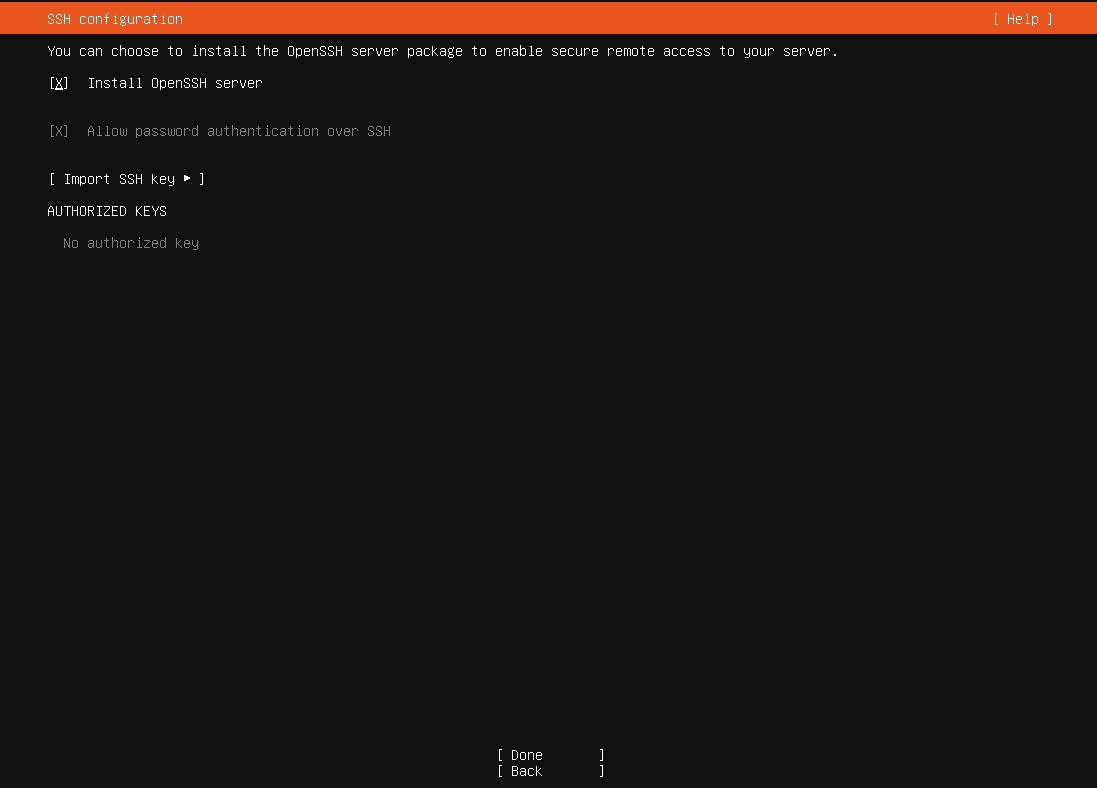
Decline Ubuntu Pro. We’re going to want to install OpenSSH, as that’s how we’re going to administer the server once it’s installed.
Finally we’re given the option to install some packages. Decline this, we’ll take care of everything we want to install later.
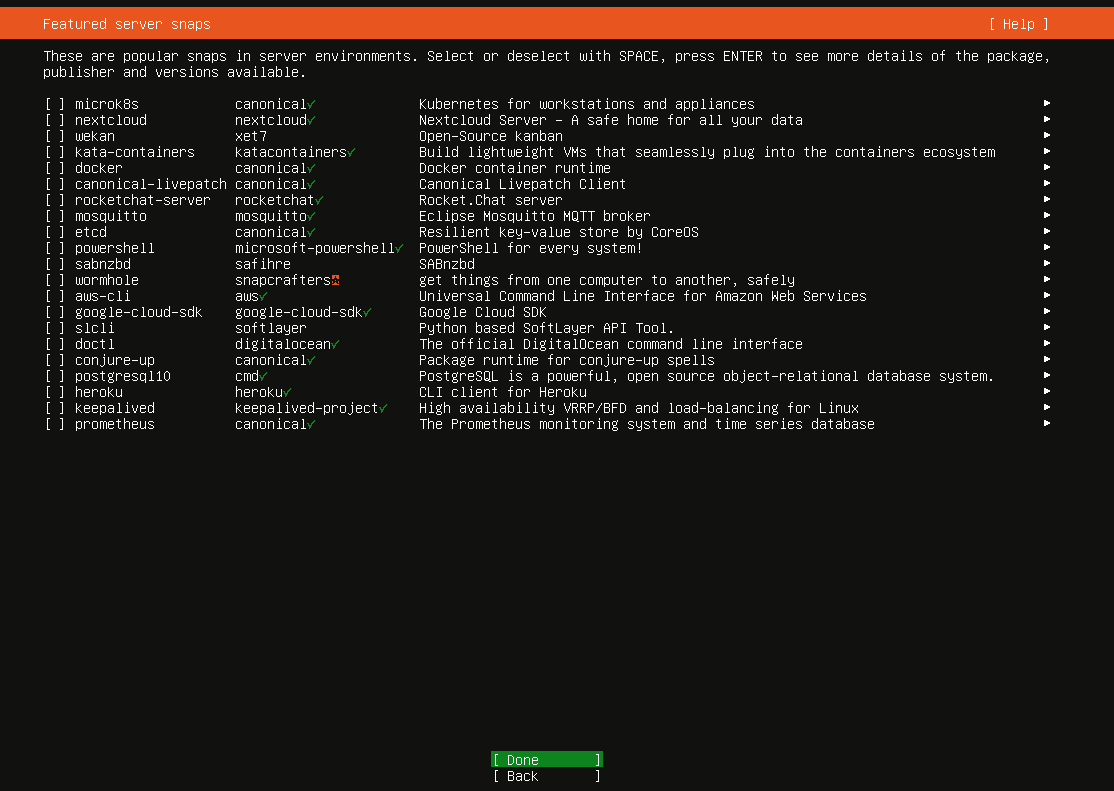
Once we hit Done here the installer will run and set up our new server. Once it completes, remove the USB drive and hit the option to reboot.
Here ends Part 1. In Part 2 we’ll cover how to log into the server and administer it via SSH.


Leave a Reply